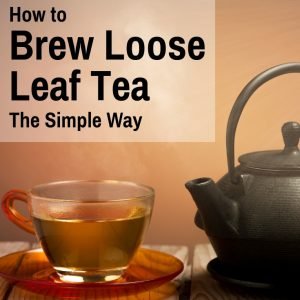
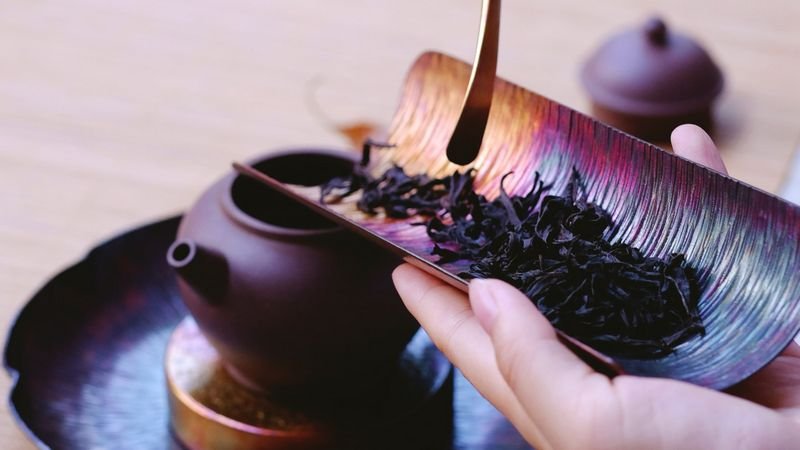
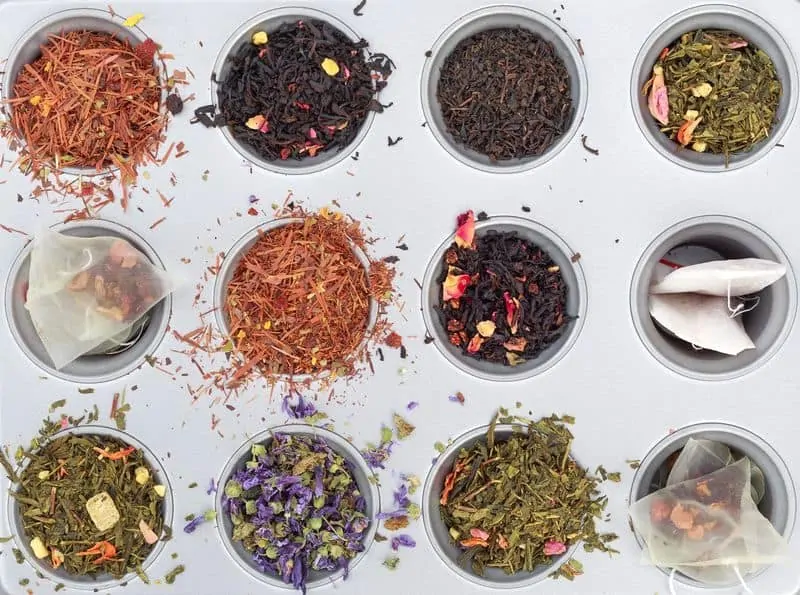
 You keep hearing how loose leaf tea tastes better than tea from a bag.
Not only that. It costs a lot less, too.
You want to make the switch.
The problem: brewing loose tea seems way too complicated.
Everyone you ask and every site you read gives different information. One says to steep the leaves in boiling water for two minutes, the other says to use 80° water for one.
And all you want is a cup of tea.
The reason for all the discrepancies is that there is no ideal brewing time for tea.
It depends on too many factors like the tea in question, your personal preferences, etc. It is impossible to give an exact answer to the question of “how to brew loose tea.”
What you can do is give good starting points that will work well enough for any tea.
Whenever you buy new tea, use these starting points for the first brew and adjust from there.
Unless your tea has instructions on the package. Then use those as your starting point.
If you feel your tea is too strong, reduce the brewing time (or use fewer leaves). If it is too weak, increase the steeping time (or increase the amount of leaves).
Table of Contents
- 1 Brewing Loose Leaf Tea: Steeping Times And Temperatures
- 2 How To Brew Loose Leaf Tea: What Vessel Is Best?
- 3 More Detailed Brewing Instructions For Loose Leaf Tea
- 4 How To Make Loose Leaf Tea: Advanced Tips From True Aficionados
- 5 Why Is Loose Leaf Tea Better?
- 6 How To Brew Loose Leaf Tea: Final Thoughts
Brewing Loose Leaf Tea: Steeping Times And Temperatures
For the amount of leaves, use the indicated number of teaspoons for each cup of tea. So, if you’re using a pot that holds 4 cups, use 4 times the indicated number of teaspoons.

Note: For herbal teas, use the instructions for black tea. For flavored teas, use the instructions for the underlying tea leaves. For example, if your flavored tea uses green tea leaves, follow the instructions for green tea.
Obviously, these instructions are very simple. That’s because I’m trying to keep the brewing process as simple as possible. That’s really all you need to get a good cup of tea and that way, there is no complicated process to stand in the way of drinking more tea.
I’ll go into a lot more detail on brewing below, with advanced techniques and tons of tips. But first, let’s take a look at the best brewing vessels to use when preparing tea.
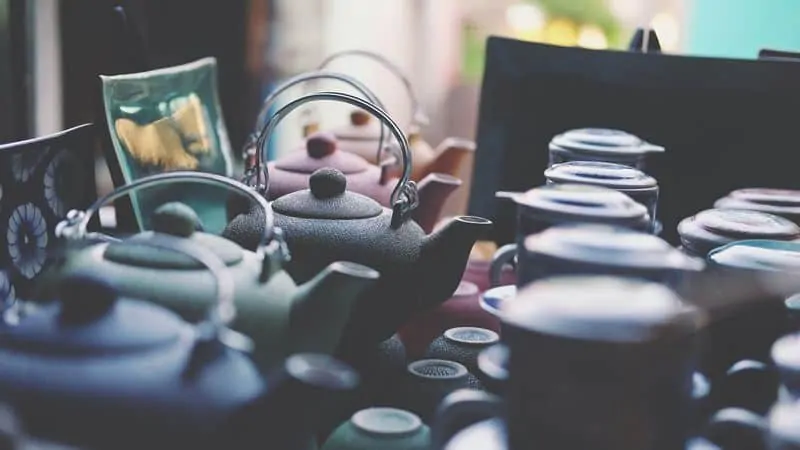
How To Brew Loose Leaf Tea: What Vessel Is Best?
Again, there is too much information and most of it is unnecessary. I am guilty of this as well.
If you read the individual tea pages on this site, you’ll see recommendations for brewing vessels like the gaiwan or the yixing. Traditional brewing vessels like these look great and are fun to use, but the truth is, tea made in one of these does not taste any different than tea made in a regular glass or ceramic teapot.
Furthermore, they have drawbacks that simpler pots don’t.
The yixing (and other clay pots) can’t be cleaned. The more you brew, the more residue from the tea seeps into the ceramic.
This is considered a good thing by many connoisseurs, but it also means that you should only ever brew one type of tea in your teapot. If you use it for oolong tea, you should only ever brew oolong tea in that pot. If you want to drink a different type of tea, you’ll need a different teapot.
Personally, I have one of these teapots and I only use it for oolong tea. I also have a regular glass teapot that I use for any other type of tea.
I would recommend anyone get a simple brewing vessel like a glass or ceramic pot or mug, whether you have a traditional pot or not. Or you can just get a complete tea service set, which always includes a tea pot or gaiwan.
You have a number of options, depending on your needs and what you already have.
Teapot With Infuser
I use a glass teapot with an infuser. Ceramic works well, too, but I prefer glass. The specific teapot I use is no longer available, but it is very similar to the Teabloom pot listed first in that article I just linked to.
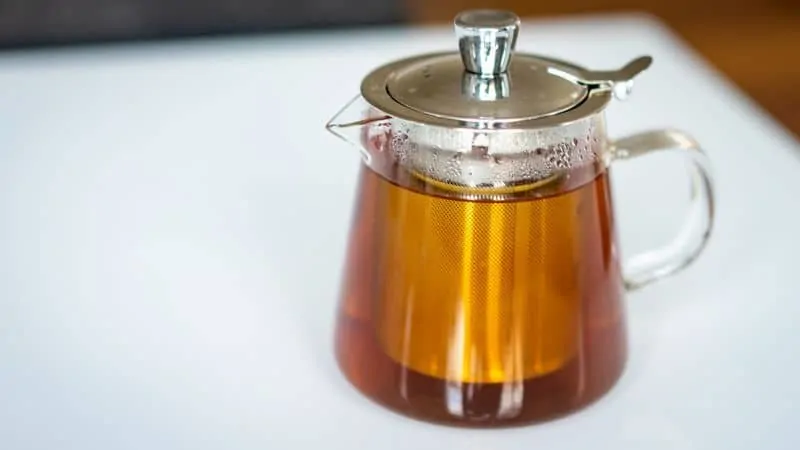
A glass pot allows you to see the color of the tea and to gauge the brewing time by that. I generally do this, rather than using a stopwatch or timer. The main drawback of a teapot is the size.
If you are only brewing tea for one, even the smallest size is probably too big.
You have to remember that loose leaf tea leaves can (and should) be steeped several times. I generally get 3 to 5 infusions from my leaves. This means 3 – 5 teapots of tea per day. I have the smallest size (600 ml), but even at the smallest size, that is 1800 to 3000 ml.
Yes, I drink a lot of tea. Most people won’t need that much, which brings me to the next type of brewing vessel.
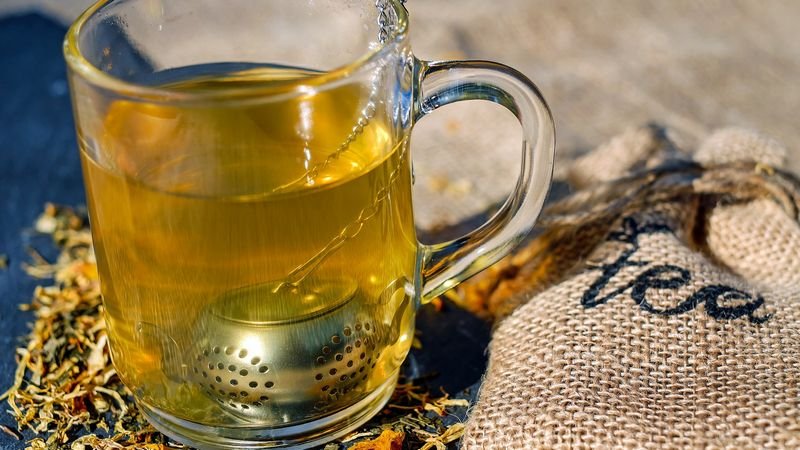
Tea Mug With Infuser
If you only prepare tea for yourself, tea infuser mugs are a great option. This way you don’t have to brew a large pot each time.
Since you get 3 to 6 infusions out of most tea leaves, this means you get 3 to 6 mugs of tea per day. If you’re the only one drinking it, this makes much more sense than having 3 to 6 entire teapots of tea.
Infuser Only
If you already have a mug, as most of us do, then you can save money and buy only the loose tea infuser.
There are a bunch of different types available, like stainless steel basket and ball infusers, mesh basket infusers or novelty ones shaped like animals or cartoon characters or pretty much anything else you can think of. You can use them with any standard mug (or just a regular glass).
There are also larger ones that work with regular teapots. If you already have a pot that did not come with an infuser, you can just buy the infuser on its own and use it with your existing pot. If you’re looking to save money, getting just the infuser is the cheapest way to go.
Travel Mug With Infuser
Finally, many people, myself included, like to have tea on the go. For this, you would want a bottle tea infuser that you can easily take on the road.
What sets these mugs apart from the regular ones is a lid that seals shut. You can take the mug with you and avoid spilling your tea.
I use a mug like this at work, but they are also great for the morning commute. They’re very similar to a thermos bottle, but with the addition of an infuser. And if you’re going on a trip, they are especially convenient when paired with a small electric kettle to heat the water.
More Detailed Brewing Instructions For Loose Leaf Tea
Once you’ve decided on the type of tea you want to brew, and you have the right tools, it’s time to make your first cup. Remember, use the appropriate steeping times and the right temperature, based on the type of tea you’re brewing.
Step One
Determine how you want to brew your tea. You can use a pot, a kettle, or brew directly in the cup, using a strainer or not. Whichever option you choose make sure everything is nice and clean before you brew.
Step Two
Based on how many cups you want to brew, carefully measure the tea and water ratio. Remember, most tea enthusiasts recommend using one teaspoon of loose leaves per cup. This means one teaspoon per eight ounces of water. Place the leaves inside the infuser and place the infuser inside the cup or kettle.
Step Three
Heat the water to the right temperature, which will vary based on the type of tea you use and how long you plan to steep the leaves. Again, follow the instructions on the package or those given above. Pour the water over the infuser and allow it to steep for the correct amount of time.
Step Four
The leaves in the infuser must be fully submerged, so they can expand and brew properly. Once the right amount of time has passed, remove the infuser. The leaves can be reused to make a additional cups. Most leaves are good for 3 to 5 infusions. If you don’t plan on making another cup, don’t save the leaves for reuse on another day.
How To Make Loose Leaf Tea: Advanced Tips From True Aficionados
The basic instructions given above are all you need to get a good cup of tea. But traditional tea brewing methods are generally more strict. They can improve your tea, but those improvements are not usually noticeable to most people. Nevertheless, some of the following tips are quite easy to implement, so you may as well.
Use Fresh Water And The Perfect Temperature
Always use filtered, fresh cold water. Tea leaves love oxygen because it helps in terms of flavor development. For that reason, you never want to reheat water that is left in your kettle. Use fresh water instead.
Note the correct temperature for your tea from the instructions n the package or from the table above. Most tea should not be brewed with boiling water. Doing so can scald the delicate leaves.
The best way to get the correct temperature is to heat it to that temperature and then stop. When water boils, it loses oxygen and, as mentioned, tea leaves need oxygen.
That said, I always just boil the water and then let it cool. It is not exact, but it gets close enough for my tastes. To get the perfect temperature every time, use a thermometer. An even better (but more expensive) option is an electric kettle that allows you to set the desired temperature.
Following The Instructions
Whether you’re making oolong tea or green tea, it’s best to follow the brewing instructions on the package the first time you brew the tea. Then adjust from their depending on your tastes.
Brew the tea for the recommended amount of time before drinking. This gives the leaves time to release their full flavor. Drinking it before the recommended amount of time, can result in a weak tasting cup. Going longer can make the tea bitter.
Of course, if you want weaker tea, then remove the leaves before the recommended amount of time. For a stronger tea, allow it to brew longer than the recommended time. It’s really all a matter of personal preference.
Brewing Times
In general, tea gets stronger the more oxidized it is. For example, pu-erh tea and black tea are fully oxidized. As stronger teas, they need longer brewing times. They also need hotter water.
Oolong tea is partially oxidized. You want to brew oolong for less time and with slightly colder water than black tea. There is a lot of differentiation when it comes to oolong tea.
Some, like Tie Guan Yin, are very mild and almost green teas. They need less steeping time and cooler water. More oxidized oolong teas like Big Red Robe need to steep longer and at hotter temperatures.
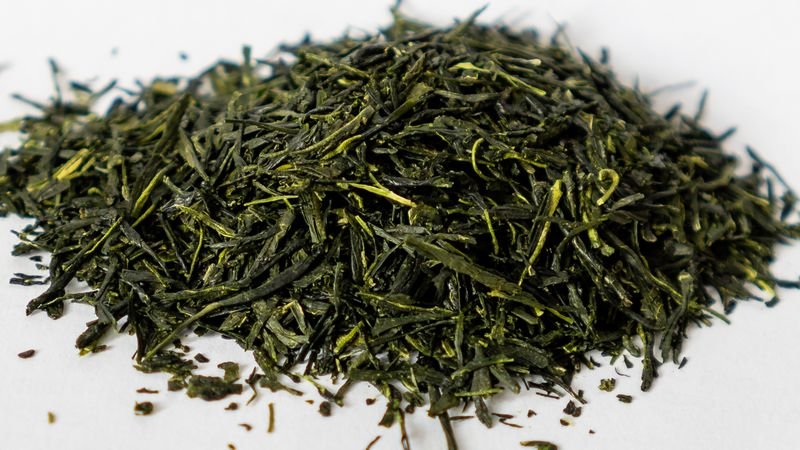
Mild teas like yellow tea, green tea or white tea are only slightly oxidized, or not oxidized at all. This means the shortest brewing times and the mildest water temperatures.
The recommended time for your tea should be indicated on the package. If it is not, use the time from the table above for your type of tea. Either way, this time is a starting point. You’ll probably want to adjust the time, based on your personal preference for stronger or weaker tea.
The Perfect Serving Size
How much loose-leaf tea to use per cup differs widely from tea to tea. For that reason, it is best to adhere to the instructions of the package for the first attempt. Then you can adjust from there based on your preference. Use more leaves for stronger tea.
If the package your tea came in does not indicate a recommended amount of leaves to use, one teaspoon per cup of tea you are brewing. This is a good starting point, but you will definitely want to adjust the amount based on the results.
Milk Or No Milk?
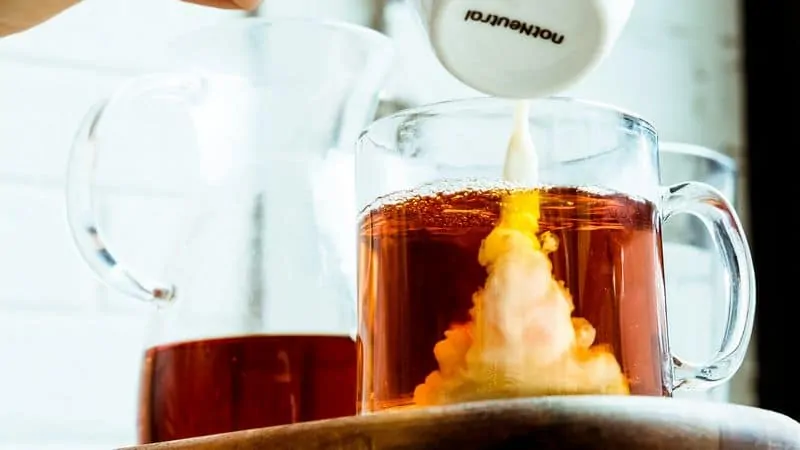
Personally, I say no milk. Ever. Of course that assumes a good loose leaf tea. If you are using poor quality tea, it might make sense to add milk (and even sugar, though I would never recommend that).
Many people agree with me that adding milk to tea isn’t very appealing. But many people swear by it. Adding milk to tea is nothing new in Europe, but in America, it’s not as commonplace.
If you do decide to add milk, do you pour the tea first and then add the milk, or add the milk first and then pour the tea?
This is usually a matter of personal choice. At least these days.
Hundreds of years ago, the milk was often added first in order to prevent the hot tea from cracking the teacup. But this really isn’t an issue with modern dishware.
If you brew directly in your cup, you have no choice but to add the milk afterwards. You can’t brew the tea if you already added the milk. If you brew the tea in a pot, then add it to a cup or cups, you can go either way. Just do what you prefer.
Note that milk does not work with every type of tea. It goes best with black tea. I wouldn’t use it with any other type.
Temperature Control
The tea should be allowed to cool down to a temperature of sixty degrees before drinking, to avoid burning your tongue. Some people like to use a thermometer to gauge the water’s temperature as it brews. If you do that, you could use the same thermometer to test when the tea has cooled down enough to safely drink.
Otherwise, I wouldn’t bother. It is easy enough to figure out if your tea is too hot without the use of a thermometer.
What Type Of Tea To Drink And When
Some types of tea are better for certain types of tea than others. Teas with a high caffeine content are best earlier in the day, for example. But be careful. So many sources will tell you that black tea has the most caffeine and white the the least. This is completely false.
Caffeine content does not depend on the type of tea. Instead, it depends on many factors: the age of the leaves (younger leaves have more caffeine), the variety of tea bush (those grown in Fujian, for example, tend to contain more caffeine), the processing (roasted teas have less caffeine), the growing conditions (shade-grown teas have more caffeine) and more.
White teas actually have more caffeine than most types, especially baihao yinzhen tea (white hair silver needle tea). It is made from only young buds, comes from a variety high in caffeine and the growing area sees a lot of cloud and fog cover. It is also not roasted.
Later in the day or after dark, the best teas to drink are herbal infusions, which don’t have any caffeine. For varieties made from the actual tea plant, your best bet is houjicha. It uses old leaves, grows in full sunlight and is roasted. It is often given to children in Japan, due to the low caffeine content.
The Proper Way To Store Your Tea
Using a type of tea caddy or an airtight container keeps your loose tea fresh and dry. It also helps the tea to retain its fragrance and can prevent the different scents of strong teas from impacting the scent and flavor or others stored in the same cupboard or pantry.
How To Use Loose-Leaf Teas For Beginners
If brewing loose-leaf is totally new to you, then it’s important that you purchase high-quality tea from a reputable company. You can feel free to experiment with new flavors and types, but in the beginning, I recommend the following:
- Buy flavors that you’re familiar with: If you normally drink green tea or English breakfast in bagged form, start off with these first. Once you become more comfortable using loose-leaf tea, measuring it out, and steeping it correctly, then you’re ready to try new and exciting flavors.
- Follow the instructions to start with: The instructions on the package (or those above, if there are none on the package) are the best way to ensure good results to start with, but tastes differ. If you love stronger tea, use more leaves, hotter water or a longer steeping time. For milder tea, do the opposite.
- Use a strainer: You can brew tea directly in the pot or cup without a strainer, but you’ll enjoy it more if you don’t have to pick leaves from your teeth. Any of the infuser options I listed above work great.
- Don’t use too many leaves: Using too much loose-leaf tea is a common mistake beginners make. But a little goes a long way. Stick to the instructions. Many people tend to pack their strainers too full with the leaves because they think that the flavor will be more intense the more tea they use. But, that’s not the case. In order to steep properly, the leaves need the ability to freely move around, which is why even just a pinch still result in a drink that’s packed with flavor.
Why Is Loose Leaf Tea Better?
Most tea drinkers use tea bags instead of loose leaf tea because the bags are just easier to use and more convenient. Clean up is also be easier. All you have to do is place the bag in a cup, pour in hot water and you’re ready to go.
While this does make it a lot easier to enjoy a hot cup in just minutes, in reality, you’re not getting the best cup. The bags are mass-produced and made with shake and trimmings.
You also don’t know how old the tea really is. For all you know you could be drinking tea that was packaged almost a year ago. As you can imagine, the tea won’t taste very fresh and whatever flavor there is will be nowhere as strong as it should be.
The bags themselves are made out of food-grade plastic or filtered paper, both of which can negatively impact the flavor of your tea.
With loose leaves, you’ll enjoy better flavor and better quality. You can control the flavor of your tea by controlling which leaves to use, how many to use and what to brew them in.
Tea bags are also tempting, because they seem cheaper. But if you compare the cost directly, in terms of how many cups you actually get, loose leaf tea is far cheaper. That is true for even the highest quality teas. You’ll find a detailed cost comparison of loose tea vs tea bags here.
Making the switch from bags to loose leaves may seem like more effort than it’s worth, but once you do, you’ll immediately recognize the difference in flavor, scent, and overall quality. If you want to switch to loose tea, but are not sure which are good and where to get them, read this post.
Another great option is to make our own tea bags and put good quality loose tea leaves inside. You can either make them from scratch from coffee filters or something similar, or you can buy pre-made bags, that actually cost less than coffee filters and save you a lot of time. Both options are detailed in my article on how to make homemade tea bags.
How To Brew Loose Leaf Tea: Final Thoughts
Now that you know how to brew tea, the different options available, and how you can bring out the most flavor in the leaves, feel free to experiment with a variety of types. The goal is to find the perfect blend for you, whether you need a cup in the morning to help get you going, a relaxing cup after work, or tea that can help you drift off easily at night.
Brewing loose leaf tea can seem complicated and the more you read about it, the more complicated it gets. But when you remove all the unnecessary information, it is actually pretty simple.
Just use the temperature and the steeping time for your type of tea from the table above for your first brew and make adjustments from there. For the brewing vessel, the main requirement is the infuser. Personally, I like to use a transparent vessel (I prefer glass over plastic), so I can see the color of my tea.
That’s all you need. Now you’re ready to go and enjoy your loose leaf tea. It really is a lot better than drinking tea brewed from teabags and once you try it, you won’t want to go back. If you want a more information about preparing various types of tea, here is a list of all of my articles on the subject.
All Articles About Preparing Tea
- How To Make Green Tea Shots (Recipes And Tips)
- How To Make Iced Green Tea (4 Different Methods)
- Matcha Accessories (Tools Needed & Easy Substitutes)
- How To Make Matcha Taste Good (19 Ways To Improve The Flavor)
- What Flavors Go Well With Matcha? (+Great Food Pairings To Try)
- How To Cold Brew Green Tea (Easy Step-By-Step Guide)
- How To Make Matcha Green Tea (Complete Brewing Guide)
- Can You Put Brown Sugar In Tea? (This Might Surprise You)
- How To Make Yerba Mate Taste Good (9 Delicious Recipes!)
- How To Make Matcha Tea Without Whisk (3 Alternatives)
- How To Ferment Tea Leaves (Easy Step-By-Step Guide)
- What To Put In Black Tea (9 Mouth-Watering Flavor Boosters)
- Can You Make Tea With A Keurig? (What You Need To Know)
- How To Dry Leaves For Tea (Without A Dehydrator)
- How To Sweeten Tea Without Sugar (Healthy & Tasty Alternatives)
- How To Harvest Chamomile For Tea (Easy Step-By-Step Guide)
- Benefits Of Honey In Tea (+The Common Mistake That Limits Benefits)
- Can You Add Milk To Green Tea? (Why You Shouldn’t)
- Can You Microwave Water For Tea? (Don’t Do It)
- Can You Make Tea In A Coffee Maker? (And Should You?)
- Tea Temperature (Best Brewing Temps For The Perfect Cup)
- How To Make Tea Without A Kettle (Using Tools We All Have)
- How To Make Tea In A Kettle (And Why You Usually Shouldn’t)
- How To Use A Tea Infuser (And Common Mistakes To Avoid)
- How To Make Tea In A Teapot The Right Way
- How To Make Iced Tea With Loose Leaf Tea
- How To Make Green Tea Taste Good Naturally
- How To Make Yerba Mate Tea (In The Traditional Style)
- How To Prepare Green Tea Like A Chinese Or Japanese Tea House
- How To Brew Loose Leaf Tea (It Doesn’t Have To Be Complicated)
- How To Use A Tea Kettle Correctly (Isn’t It Easy?)
I’ve just bought a stove stop kettle with a whistling spout, but the spout lever is metal and gets burning hot, so I have to wait for the kettle to cool down before opening the spout to pour out the water. Is there any way around this?
Use an oven mitt or replace it with an insulated lever. Or insulate it yourself.
How about using an Ov Glove or any other potholder..
Fuck you Daniel tell us what to do if a tea kettle boils dry instead of scolding us. Dick.
“While a traditional kettle can boil water at a higher temperature than an electric model, the electric kettle can boil water at a much faster rate.” So a “traditional” kettle can boil water to over 100C?
Yes, if you leave it on the stove, it will keep heating it up.
Just like every modern electric kettle can do where you can set it to a certain temperature. Which is super useful when preparing a drink e.g. green tea that doesn’t require boiling water. I don’t see any advantage the stove top kettle has over an electric one. It’s slower and doesn’t have features like holding temperature.
No traditional kettle can heat the WATER to over 100C unless the kettle is at air pressures equivalent to being *below* sea level. An exception would be if there is enough dissolved solute (e.g., huge amounts of salt or sugar) in the water. Then the boiling temperature can go up by half a degree perhaps, maybe more if you’re practically making a salt mud bath. All drinkable tap water boils right around 100.0 C at seal level. At higher altitudes, the water boils at an even lower temperature.
Is it safe to use a stainless tea kettle on a glass stove top?
I don’t see why it wouldn’t be, unless I’m missing something.
My new whistling tea kettle is not whistling any idea for me
RFC (return for credit)